Creating a Clash Job
From the Task-based Tools zone, select the Clash Detection
 tool. The Clash Detection screen
opens. Select "+" to create a new clash job. The Edit Clash Job screen opens.
From the General Tools group, you can select Rename to give the clash job a
name. You can also select Delete to delete the current job. By default, the
clash jobs are named ClashJob 00n in sequential order.
tool. The Clash Detection screen
opens. Select "+" to create a new clash job. The Edit Clash Job screen opens.
From the General Tools group, you can select Rename to give the clash job a
name. You can also select Delete to delete the current job. By default, the
clash jobs are named ClashJob 00n in sequential order.

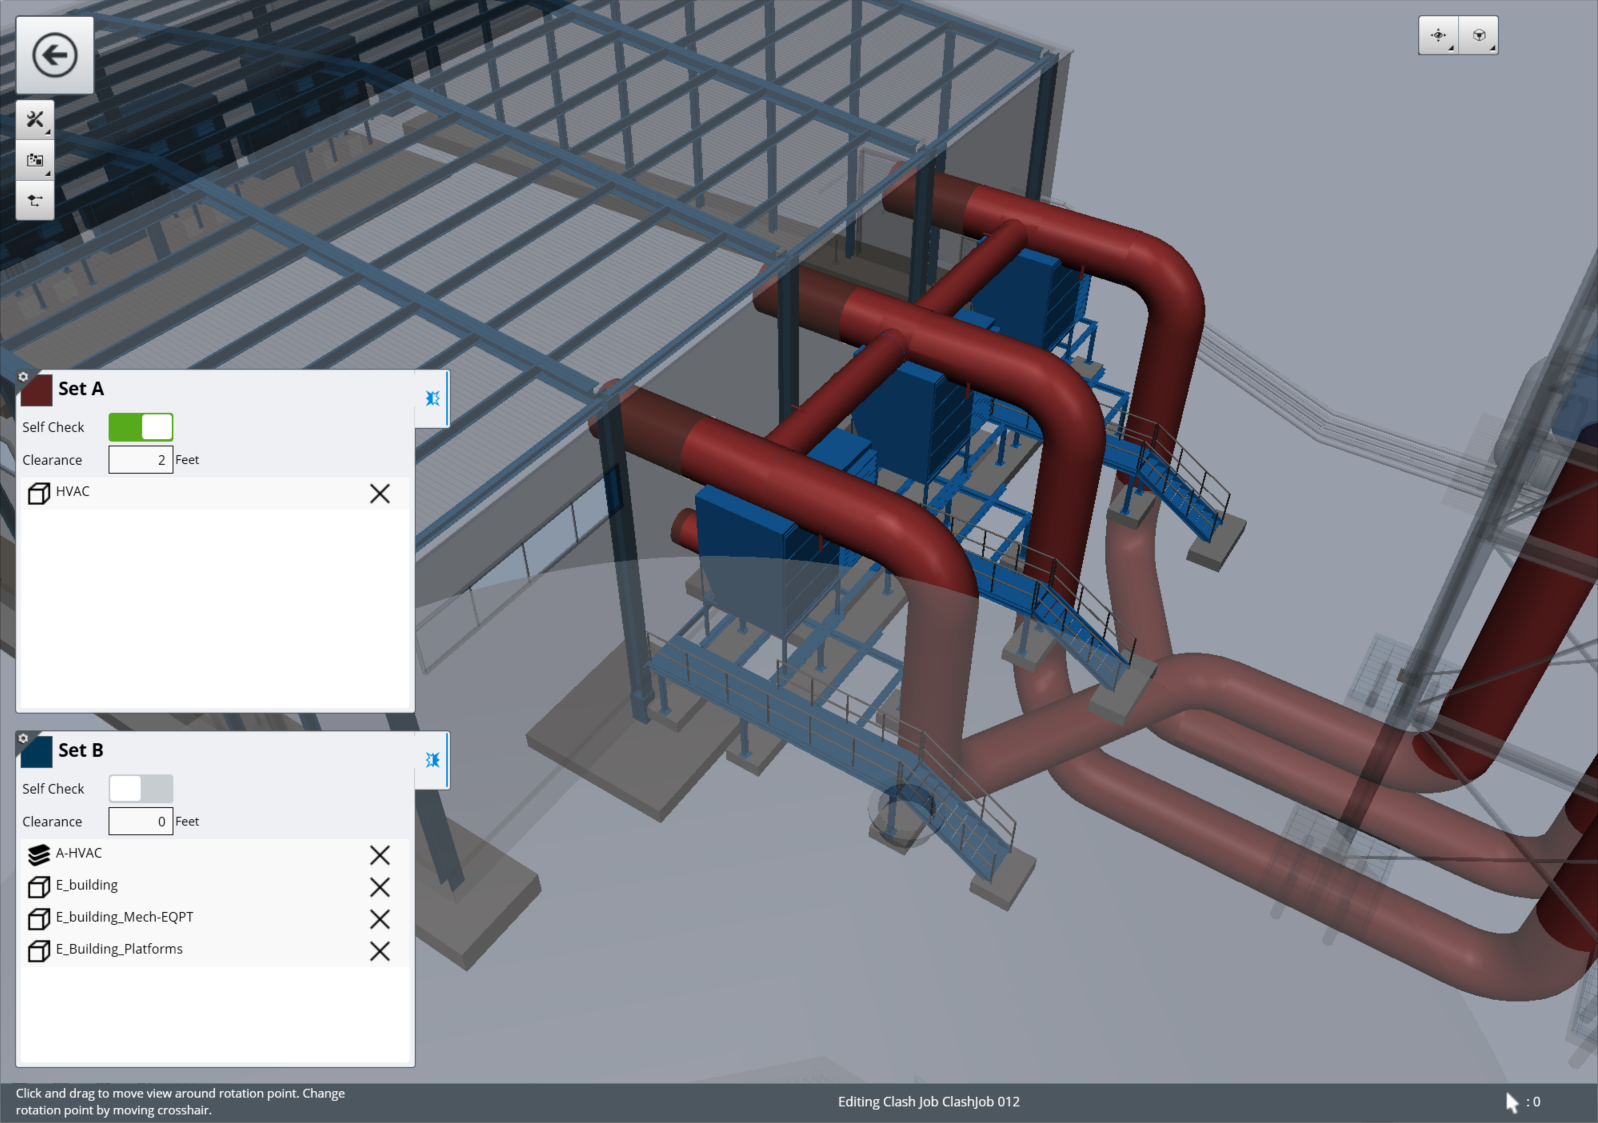
The properties of the clash job display in the middle left zone and lower left zone. The groups of items are called Set A and Set B. Elements in Set A display in red in the middle left zone and elements in Set B display in blue in the lower left zone. Select Self Check if you want to check a group of items against itself. Change the Clearance value if you want to add extra clearance distance between components.
Categories and Models
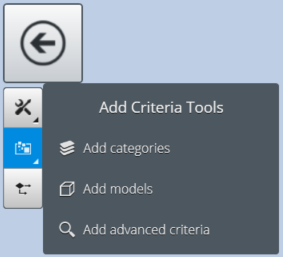
To add categories to the job criteria, from the Task-based Tools select the Add Criteria tool group and select the Add Categories tool.
From the Add Categories dialog, select the category or
categories to add to Set A and Set B. To add models, select the Add Models tool
and choose which model(s) to add to Set A and Set B. Select
 if you want to select all the
levels or models. Select
if you want to select all the
levels or models. Select
 if you want to clear all the
selections.
if you want to clear all the
selections.
Advanced Search
You can also add job criteria using the Advanced Search.
From the Task-based Tools select the Add Criteria tool group and select the Add
Advanced Criteria tool. In the Advanced Search dialog that opens, create a
search query to add to the job. Either start typing in the name of a class or
select the down arrow to see a list. When you start to type, the list appears
filtered to your text. Once you have selected a class, you can pick a property
in the next field. Based on the type of property text or numeric, the next
button defines the operand used for the search. The last field is the property
value. If you want to add additional criteria to the search query select the
"+" or add button. You can delete or change the order of your criteria by first
selecting it, turning on the check box, and then selecting one of the context
tools that appear in the tool bar. Criteria can be grouped by selecting
multiple rows and then selecting the group
 button from the tool bar. Once
you have created a search query, add it to the job by selecting Add To Set A or
Add To Set B.
button from the tool bar. Once
you have created a search query, add it to the job by selecting Add To Set A or
Add To Set B.
You can save the search as a template for recall at a
later time. The list of saved templates displays in a drop down menu on the
dialog. To create a new template, select the Manage Template icon.

Processing the Job
Once you set up the job criteria and suppression rules, select the back button. The Clash Detection screen opens with the Process Clash Job dialog box. Select Process to process the clash job. When the clash job is processed, the number of clash job results for a clash job are displayed in the Clash Detection tab of the Content Management zone on the middle left. For information on how to view and edit clash job results, go to the Clash Results topic.